|
|
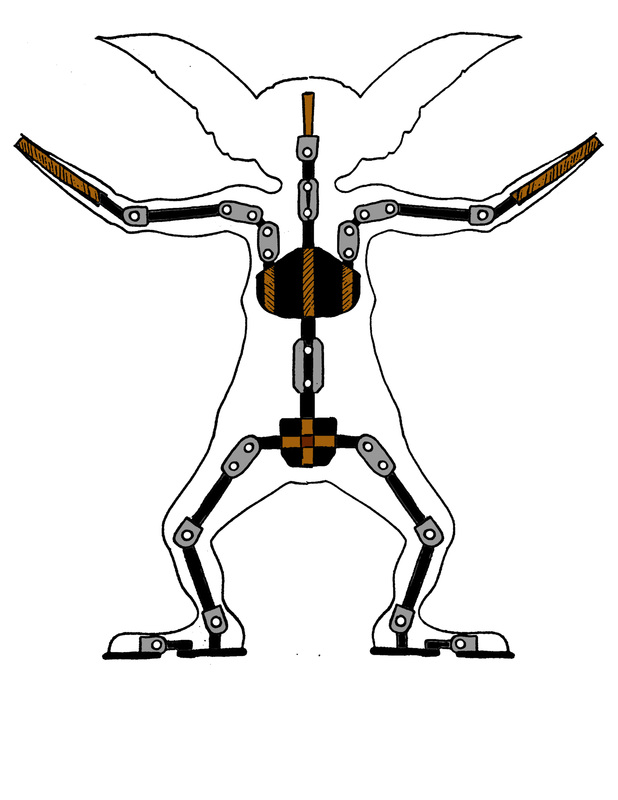
The first thing I needed to do was to plan out how this armature might look on the inside, so I did this technical drawing outlining the internal structure and design. This was really beneficial when it came to ordering my parts, as I knew how many joints i'd need, and where they would be situated in the body.
Once this technical drawing was finalised, I made contact with well respected armature builder, John Wright. Who had a few suggestions to improve my design. For example, with the size of the puppet, he suggest I use a 9mm joint in the spine as opposed to the proposed 6mm. This would make the core of the puppet more durable and able to support more weight. John was kind enough to make me the joints I needed at an excellent price, and also provide any further assistance should I need it during the fabrication stage.
Once this technical drawing was finalised, I made contact with well respected armature builder, John Wright. Who had a few suggestions to improve my design. For example, with the size of the puppet, he suggest I use a 9mm joint in the spine as opposed to the proposed 6mm. This would make the core of the puppet more durable and able to support more weight. John was kind enough to make me the joints I needed at an excellent price, and also provide any further assistance should I need it during the fabrication stage.
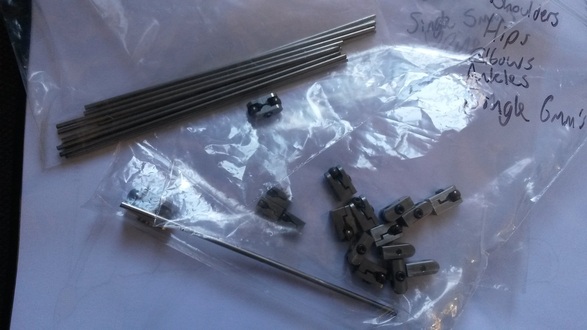
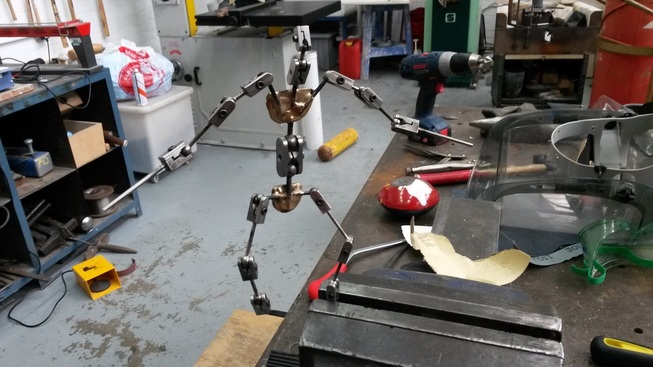
It took about a week for the parts to be made, but once they ready I was able to start thinking about putting them together in the fabrication centre. The first thing I needed to do was measure and cut the rods to the right size, in relation to my technical drawing. So i had to use a hacksaw and a vice to do this.
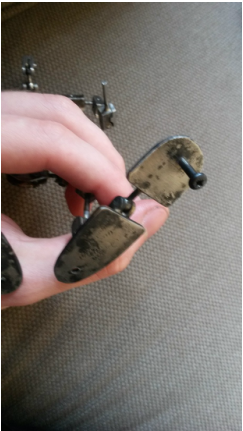
Once all of my rods were cut to their correct sizes. I then had to cut and shape the chest plate, hip plate and foot plates. This was done by cutting out the basic shapes using an sheet steel cutter, and then filing them down to a smooth, curved finish.
Once all of my rods were cut to their correct sizes. I then had to cut and shape the chest plate, hip plate and foot plates. This was done by cutting out the basic shapes using an sheet steel cutter, and then filing them down to a smooth, curved finish.
|
|
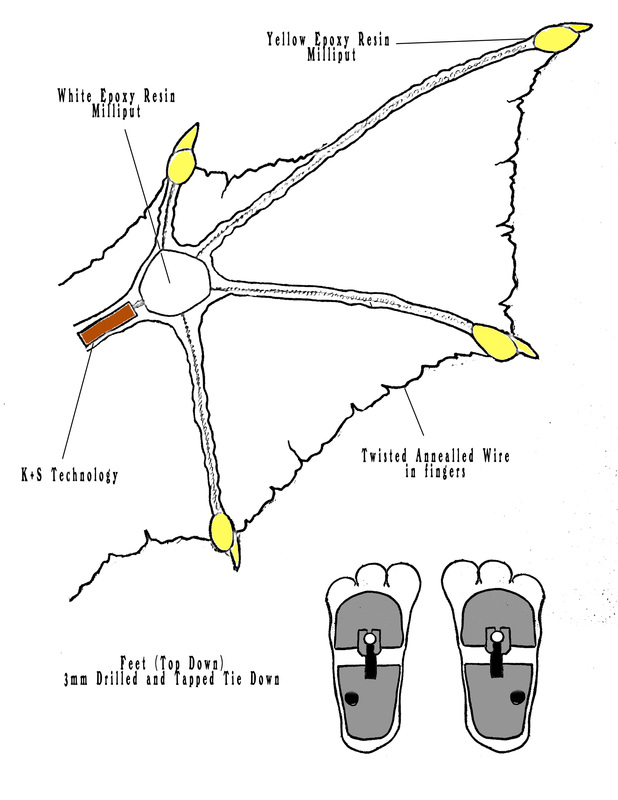
I also drilled 3mm tapped holes into the foot plates so that the puppet could be tied down to the set floor easily and securely.
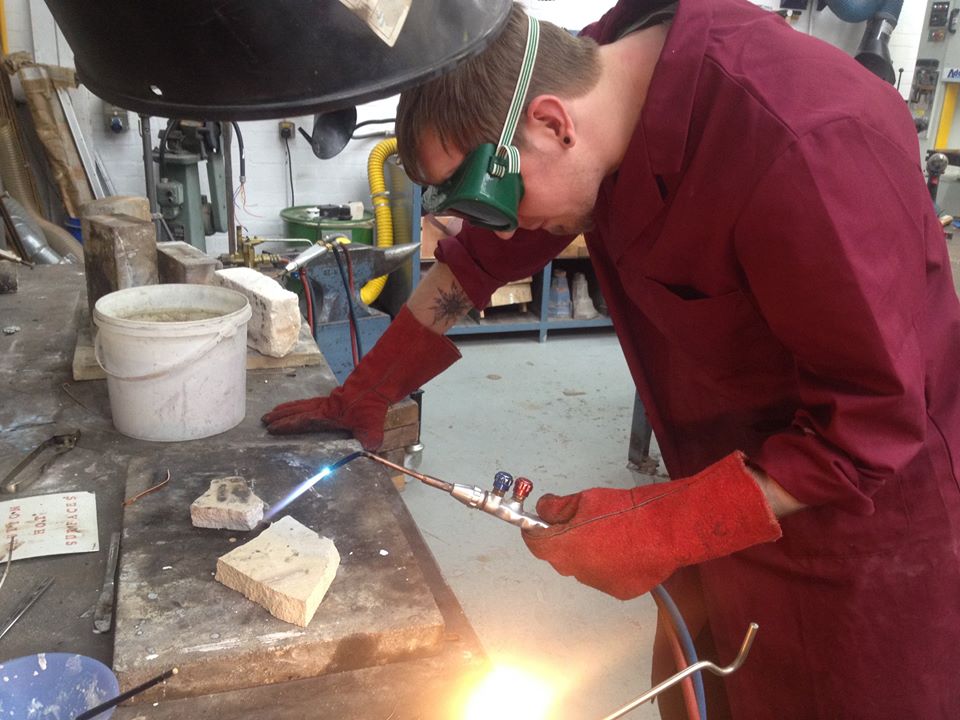
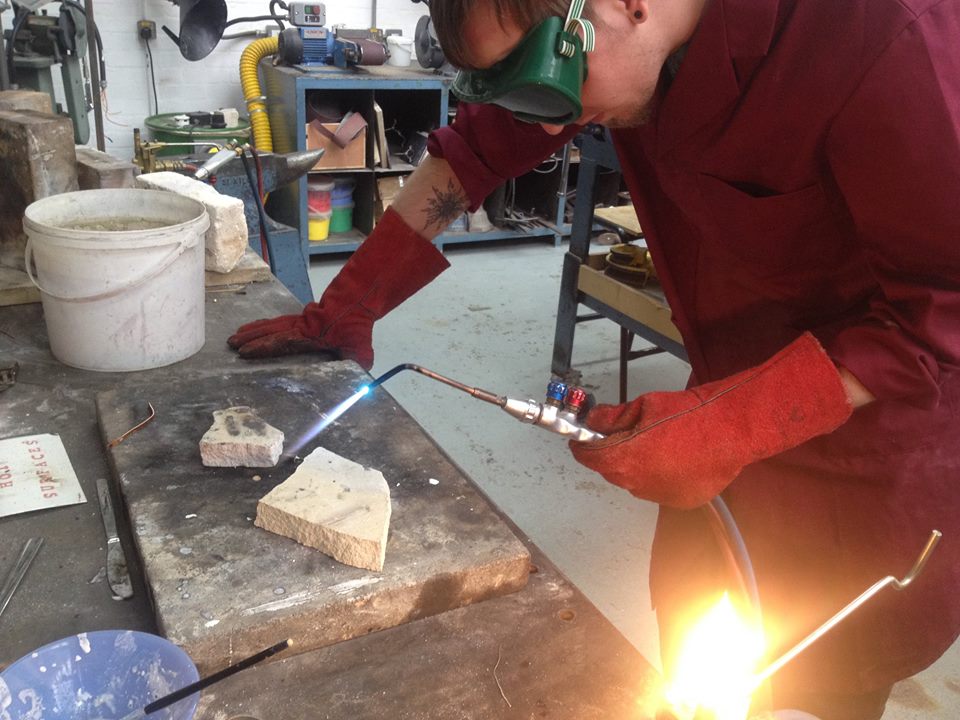
Then it was time to start the process of silver soldering and brazing all of my rods, balls and plates together. This meant that I would have to learn how to use an Acetylene torch, as well as the appropriate fluxes both silver solder and bronze braze.
Then it was time to start the process of silver soldering and brazing all of my rods, balls and plates together. This meant that I would have to learn how to use an Acetylene torch, as well as the appropriate fluxes both silver solder and bronze braze.
|
|
Once I had been taught to use the Acetylene torch and the corresponding health and safety procedures regarding safety wear and emergency shut-offs, I was able to begin Silver Soldering.
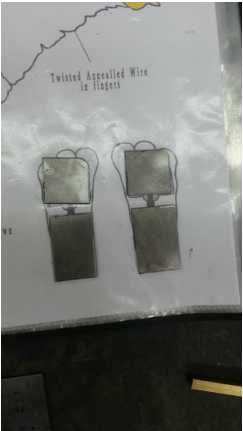
The first stage of the process was to apply the correct grade of flux to both the solder and the surface that the solder was to be applied to. Then once I held the heat on the joint the solder would eventually melt down and flow over the fluxed areas. When soldering the balls onto the rods, it was best to flux the rod and the inside of the ball. Then, once the ball was placed on the rod, and the solder was applied the flux would carry the solder into the thin space between the ball and rod, thus creating a really, strong bond. This action, of the flux carrying the solder is known as "Capillary Action".
I had to be careful not to make any mistakes as silver solder is incredibly pricey, but there were a few instances where I had not put enough solder or flux on certain joints and was forced to resolder the entire joint.
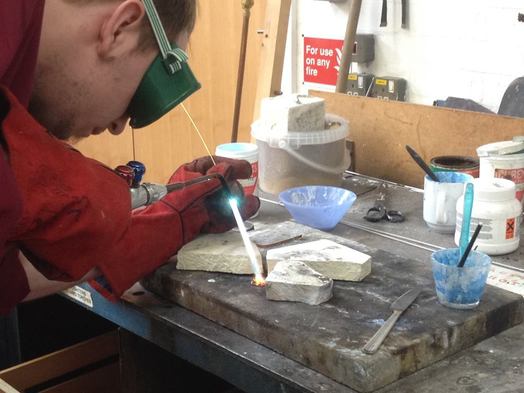
For areas on the armature that needed to be super strong, I would need to use a suitably strong bonding material. Above shows me using a bronze brazing rod to weld the rods onto my puppets chest plate. This was a really tricky technique as to braze two surfaces together they need to be exceptionally hot, and trying to avoid melting the previously applied silver solder was pretty tricky. The best process seemed to be to apply the correct brazing flux to the surfaces you wished to join, and also to the brazing rod itself. Then I would apply heat equally to both surfaces until they were almost red hot and the flux had gone clear and glassy. I could then melt the bronze onto the require area, and through capillary action the material would be carried via the flux, fusing the two surfaces.
I definately had to practice to get this right. Initially I was not heating both surfaces evenly so the braze would stick to one surface but not the other, thus making a useless bond. But once I realised the problem, all it took was to apply some more flux, heat BOTH the surfaces equally and then apply the brazing rod and allow the flux to do its work.
I definately had to practice to get this right. Initially I was not heating both surfaces evenly so the braze would stick to one surface but not the other, thus making a useless bond. But once I realised the problem, all it took was to apply some more flux, heat BOTH the surfaces equally and then apply the brazing rod and allow the flux to do its work.
Once all the soldering of the balls and joints was done all that was left to do was to braze the feet in place, and add the various pieces of copper K+S to the neck, wrists and rigging points. Copper has a very low melting point so to attach it i'd have to use regular solder or Araldite, an epoxy adhesive.
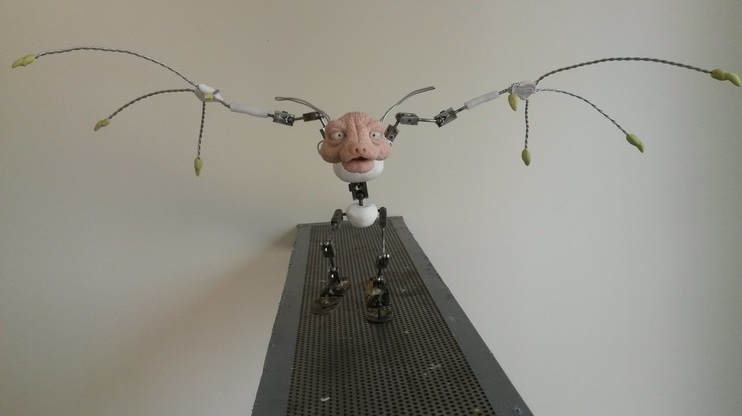
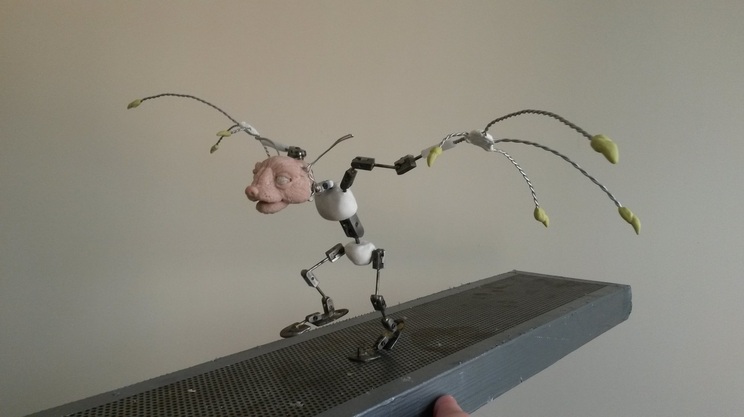
Once the armature was finished, I added a lightweight sculpey chest and waist with K+S inside to act as rigging points... all that is now left to do is to skin the puppet, but before that I will do a series of test animation using soley the unskinned armature as this will give me a better understanding of its mechanical action.
